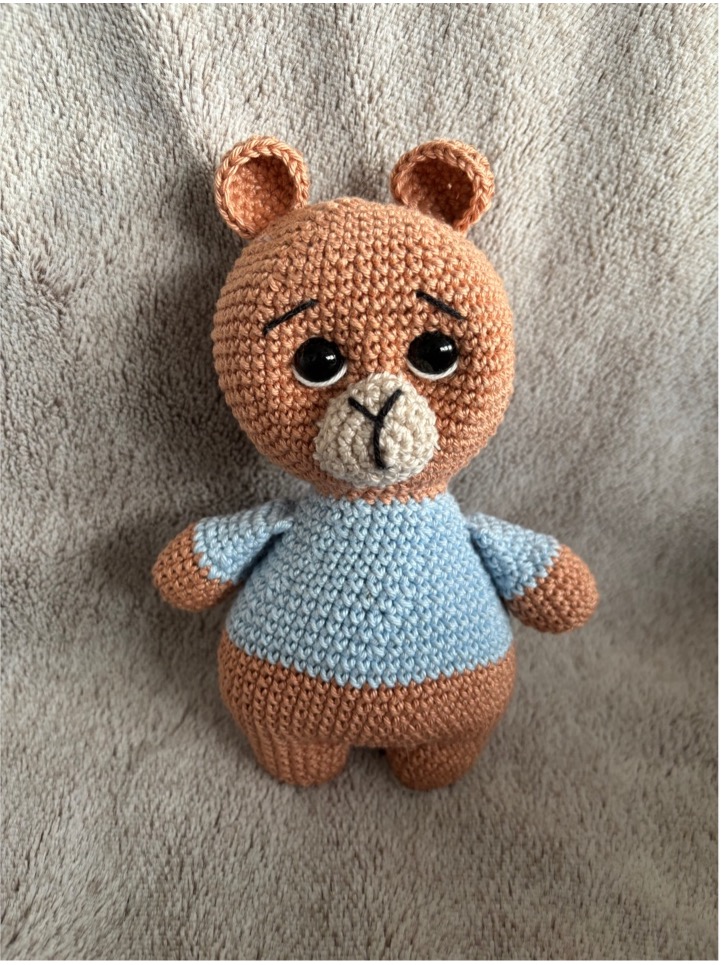

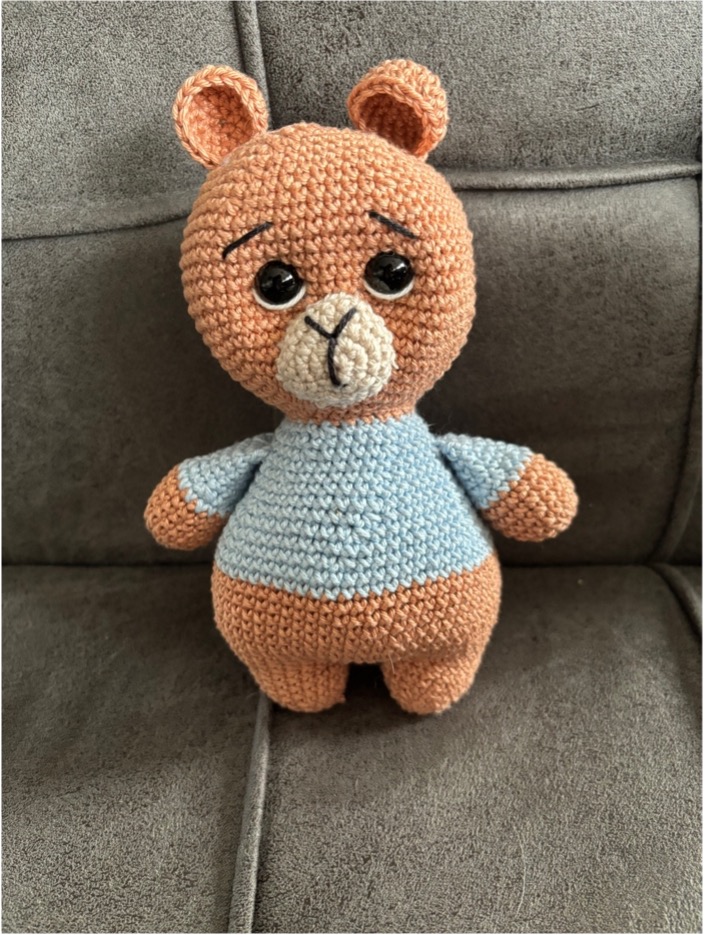
The new year calls for some nice new creations and that is why I will write out the pattern of one of my latest designs here for free. This bear is fun and easy to make and you can of course choose a color combination to your own taste.
What materials do you need?
Abbreviations
Mr = Magic ring
sc = Single crochet
sl.st. = Slip stitch
dec = Decrease
Inc = Increase
Ch = Chain
St(s) = Stitch(es)
This pattern is copyrighted, so please do not copy/publish it in any way. There is a lot of work in devising and writing out all the patterns, so please respect this 😊 Posting the bear itself on your socials, with a reference to me, is of course very much appreciated!
Body (brown)
We crochet the legs first because we are going to crochet the body as a whole. We will crochet the arms, tail, etc. separately. So, you crochet the first part twice and then attach it together. I will show this with the help of photos.
1. | 6 sc in the mr | 6 |
2. | Inc in each st | 12 |
3. | Sc in all 12 sts | 12 |
4. | (1 sc, inc) x6 | 18 |
5-6 | Sc in all 18 sts | 18 |
We will crochet this part a second time. You close the first part with a sl.st. and fasten off. With the second part you do not fasten off, because with this we will attach the parts together. For clarification I speak about part 1 and part 2 (so you crocheted part 2 last and is still on your crochet hook).
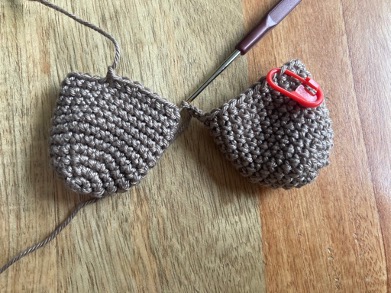
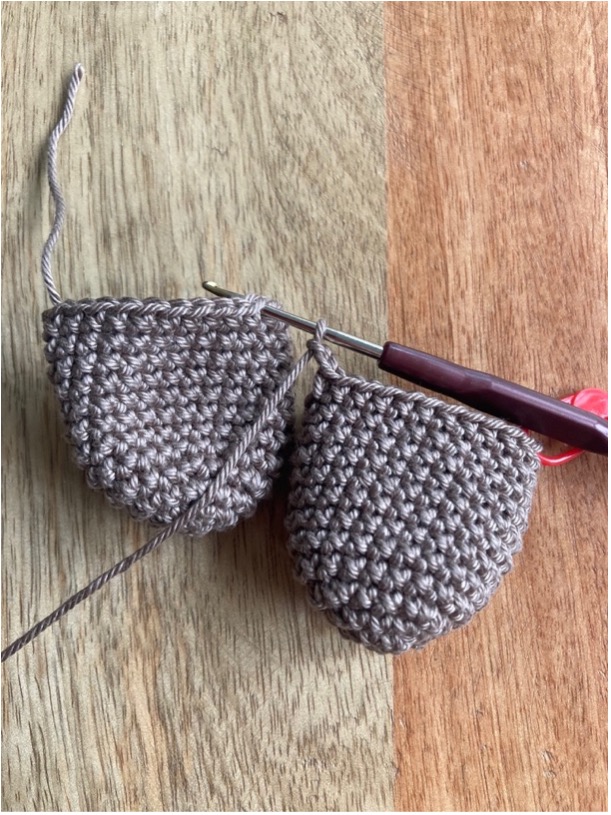
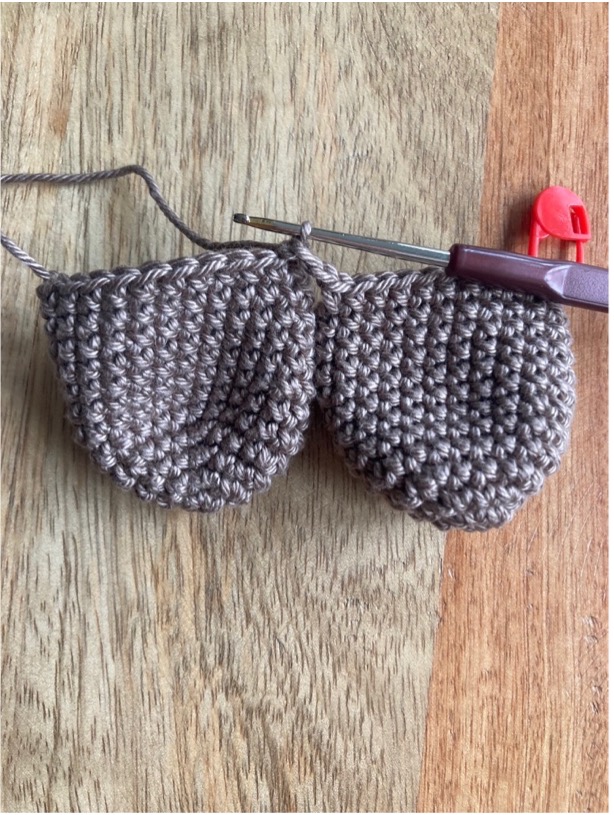
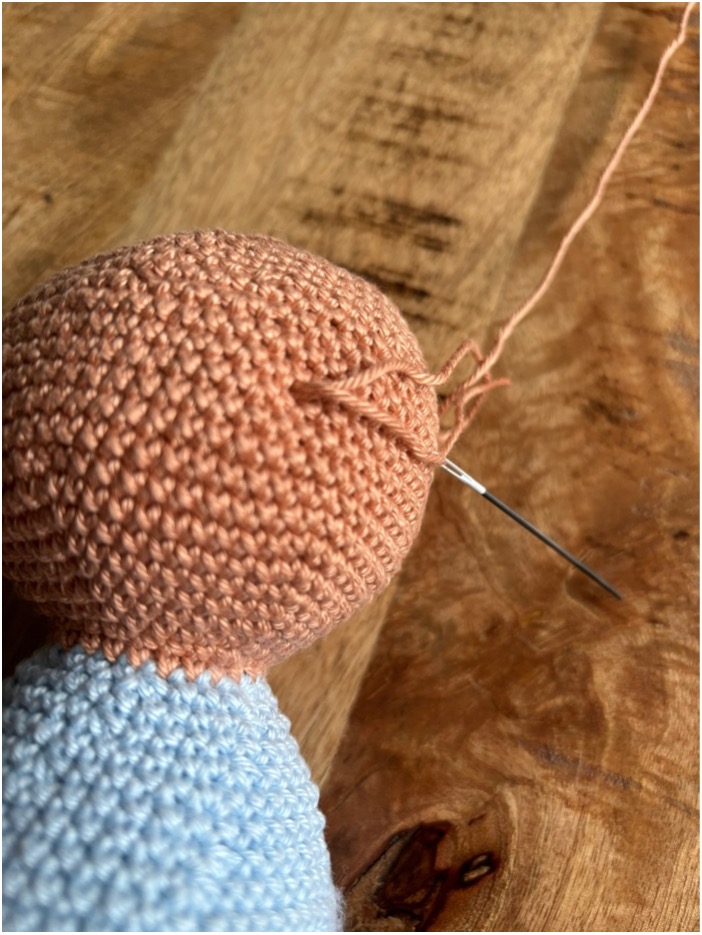
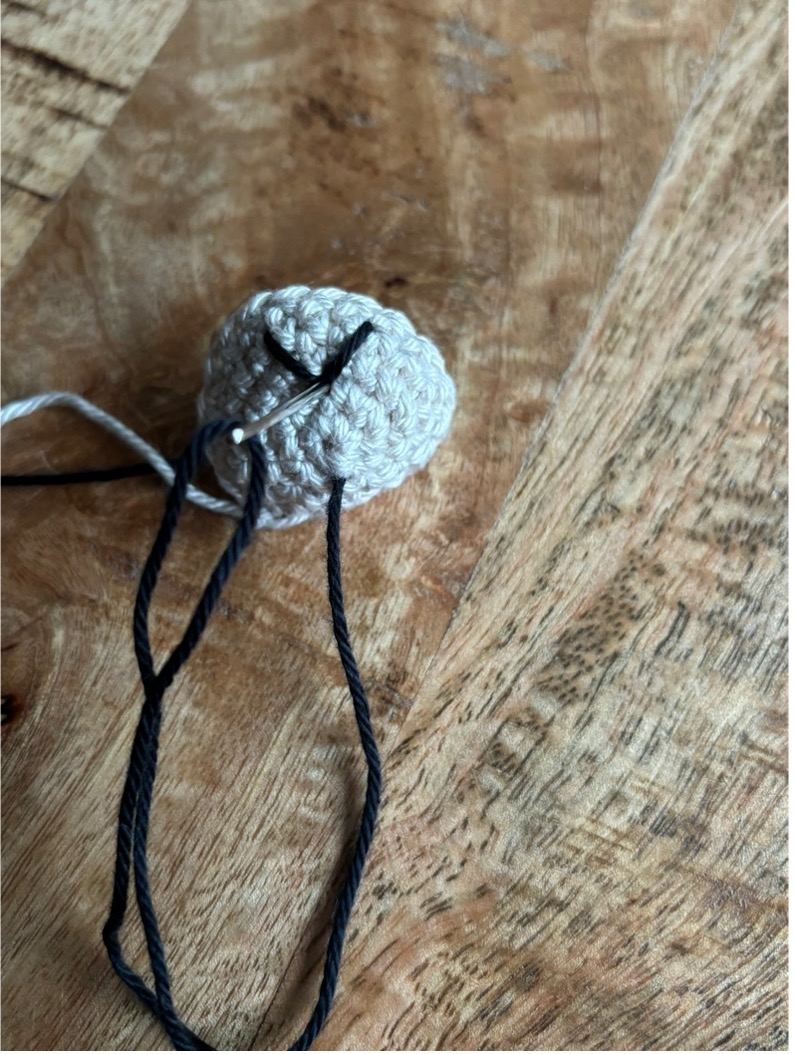
7. | Work 9 sc on part 2, then chain 3. Now we are going to attach Part 1 to Part 2. Slide your needle through any stitch of part 1 (while part 2 is still on your hook) and make a sc to join the parts together (see pictures below) Now you crochet: – Sc in all 18 sts (Part 1) – On the 3 chains work 3 sc – The remaining 9 sc from part 2 |
|
The photos below are from one of my other patterns, but the principle is the same 😊
Now it has become one. Because you work inthe round, you will of course pass the chain-3 twice. Both times you also work 3 sc’s (so i twill be 6). This way you will end up with a total of 42 sts (18 x 2 + 6 chain stitches).
8. | Sc in all 42 sts | 42 |
9. | (6 sc, inc) x6 | 48 |
10. | (7 sc, inc) x6 | 54 |
11. | (8 sc, inc) x6 | 60 |
12-18 | Sc in all 60 sts | 60 |
Fasten off brown and continue with blue. Close the round with a sl.st in the next stitch and cut the thread. Then attach the blue thread but do this 2 stitches before the sl.st you just crocheted. On round 19 you crochet 60 sc but skip the stitch diagonally below the sl.st. This way you ensure that the color change is as little visible as possible on the body. If you notice you have less than 60 sts, then just inc. in the last stitch.
You can make all color changes in the pattern this way.
19-20 | Sc in all 60 sts | 60 |
21. | (8 sc, dec) x6 | 54 |
22. | Sc in all 54 sts | 54 |
23. | (7 sc, dec) x6 | 48 |
24. | (6 sc, dec) x6 | 42 |
25-26 | Sc in all 42 sts | 42 |
27. | (5 sc, dec) x6 | 36 |
28. | Sc in all 36 sts | 36 |
29. | (4 sc, dec) x6 | 30 |
30. | Sc in all 30 sts | 30 |
Fill the body firmly, also make sure you fill the legs firmly. Continue filling as you crochet
31. | (3 sc, dec) x6 | 24 |
| Fasten off blue and continue with brown |
|
32. | Sc in all 24 sts | 24 |
33. | (3 sc, inc) x6 | 30 |
34. | (4 sc, inc) x6 | 36 |
35. | (5 sc, inc) x6 | 42 |
36. | (6 sc, inc) x6 | 48 |
37. | (7 sc, inc) x6 | 54 |
38. | (8 sc, inc) x6 | 60 |
39. | (9 sc, inc) x6 | 66 |
40-46 | Sc in all 66 sts | 66 |
47. | (9 sc, dec) x6 | 60 |
48. | Sc in all 60 sts | 60 |
49. | (8 sc, dec) x6 | 54 |
50. | Sc in all 54 sts | 54 |
51. | (7 sc, dec) x6 | 48 |
52. | Sc in all 48 sts | 48 |
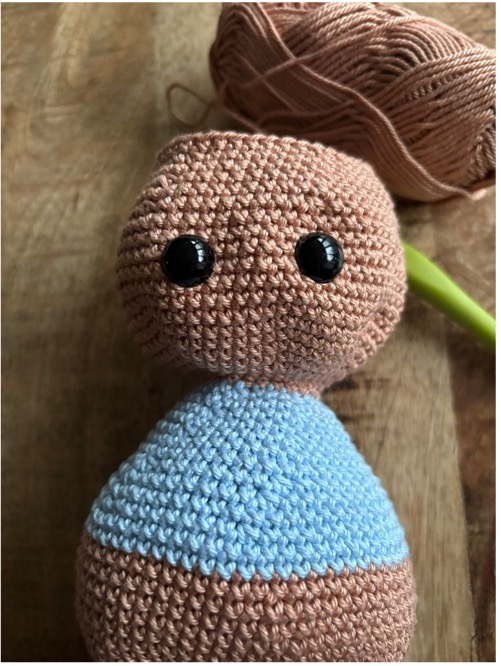
Place the safety eyes in round 43, with 8 sts gap between them.
| 53. | (6 sc, dec) x6 | 42 |
| 54. | (5 sc, dec) x6 | 36 |
| 55. | (4 sc, dec) x6 | 30 |
| 56. | (3 sc, dec) x6 | 24 |
| 57. | (2 sc, dec) x6 | 18 |
| 58. | (1 sc, dec) x6 | 12 |
| 59. | Dec x6 | 6 |
Close the round by working all single crochets together and neatly hide the threads.
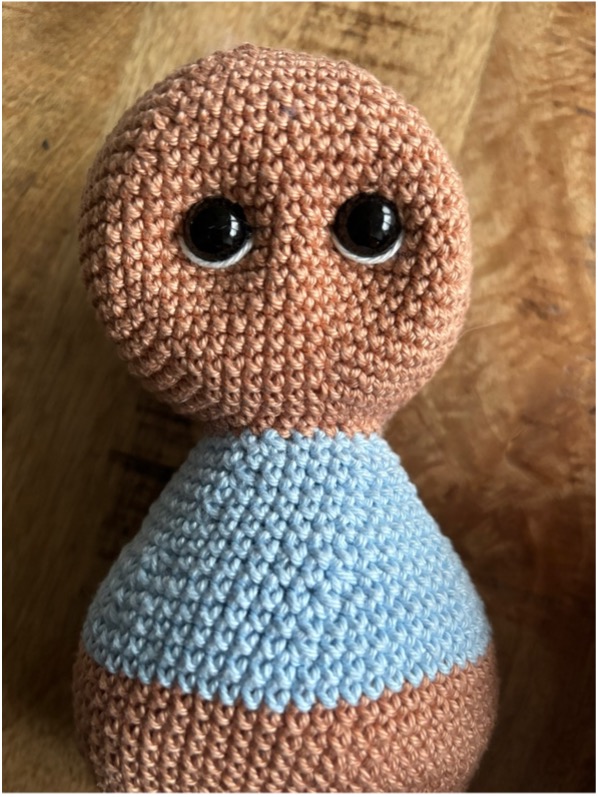
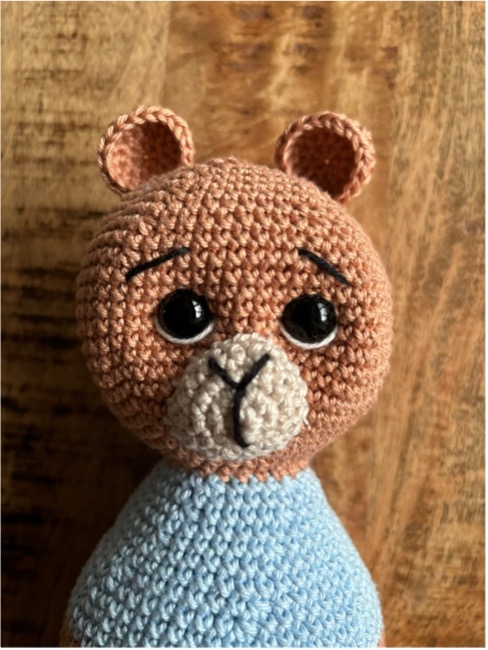
Details at the eyes
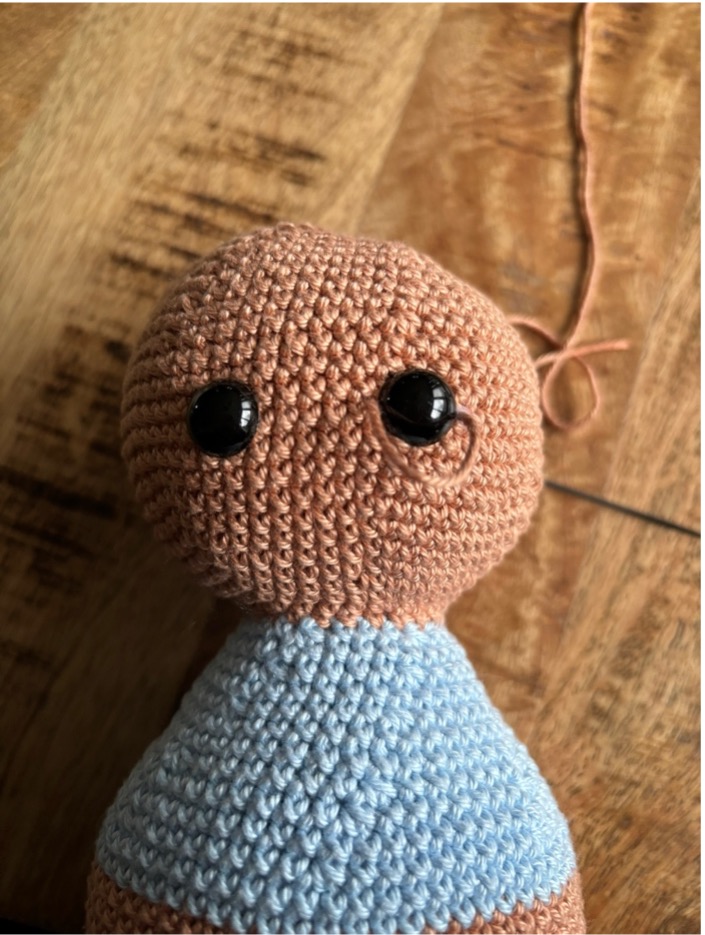
At first I always put a thread along the eyes so that they are deeper in the head. I do this with the same color as the head. Then with white I make a line around the eye, so that they become more expressive.
Insert the brown thread in the back of the head all the way past the eye
Pass the thread in front of the eyelet and insert it again on the other side next to the eye
Pull the thread through the head back to the back of the head. Make sure that you end up in the same place as where you inserted the thread in step 1. Then you pull the threads slightly, so that the eye is more in the head. Tie a small knot to keep them in place and neatly tuck away the threads.
The white line goes in the same way as described above. Just do not pull it too tight, because then the white line disappears behind the eye. With the black thread you can make eyebrows above the eyes.
Muzzle (cream)
1. | 6 sc in the mr | 6 |
2. | Inc in each sts | 12 |
3. | (1 sc, inc) x6 | 18 |
4-5 | Sc in all 18 sts | 18 |
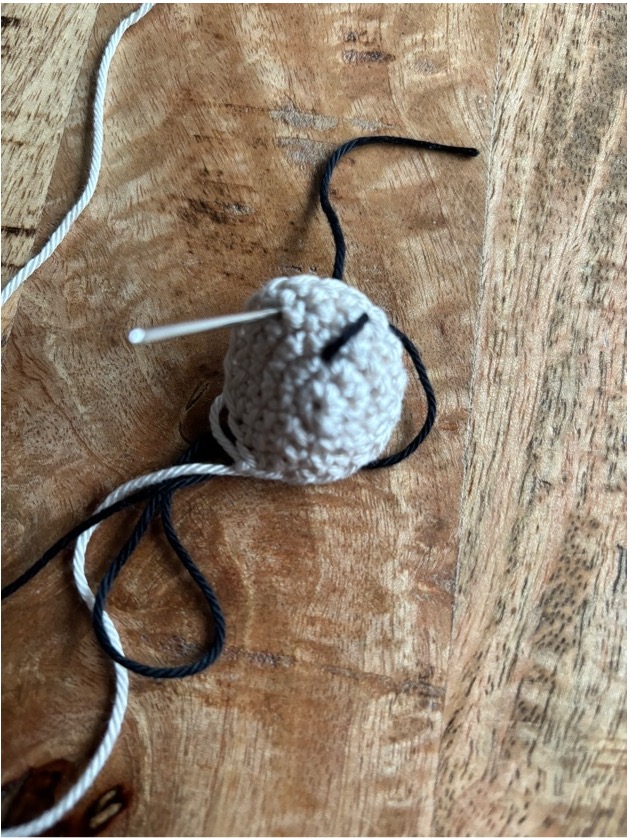
Finish with a sl.st. and leave a long thread for attachment. With black thread we are going to make a nose on the muzzle. See the pictures below for clarification.
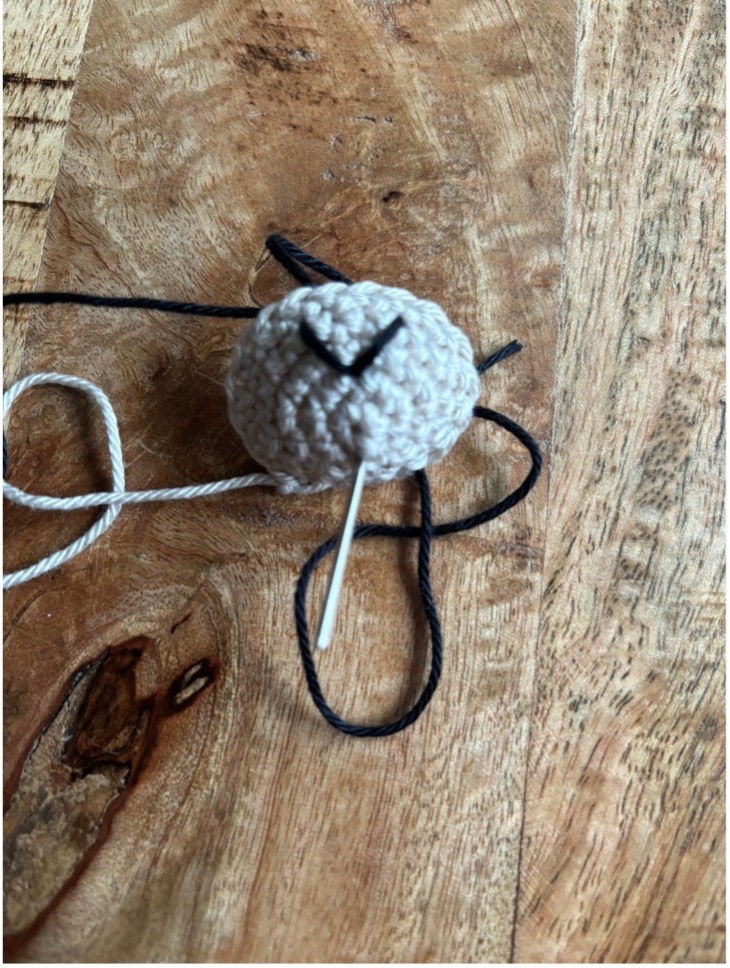
Insert your thread from the back to the front and make a diagonal line downwards (the middle). Do the same on the other side to form a V-shaped shape.
We are now going to make a line under the V. Insert your thread from back to front, a few stitches below the V. See the photo above.
Then insert the thread back to the back at the bottom of the V. (see photo above).
Hide away your threads at the back.
Attach the muzzle on the head on round 35-42 in the middle between the eyes. Once you still have a small opening, you can lightly stuff the muzzle.
Ears (brown)
Make two
1. | 6 sc in the mr | 6 |
2. | Inc in each sts | 12 |
3. | (1 sc, inc) x6 | 18 |
4-5 | Sc in all 18 sts | 18 |
Finish with a sl.st. and fasten off, leave a long thread for attachment. Place the ears next to the mr in rounds 55-52.
Arms (brown and blue)
Make two
1. | 6 sc in the mr | 6 |
2. | Inc in each sts | 12 |
3. | (1 sc, inc) x6 | 18 |
4-7 | Sc in all 18 sts | 18 |
| Fasten off brown and continue with blue |
|
8. | Sc in all 18 sts | 18 |
9. | (1 sc, dec) x6 | 12 |
10-13 | Sc in all 12 sts | 12 |
Fill the arm, but make sure that it is not filled too tightly at the top, so you can attach it easily.
Press the ends together and crochet the opposite sc’s together to close the arm. Leave a long thread to attach the arms to the body. Then attach them to the sides of the body in round 28.
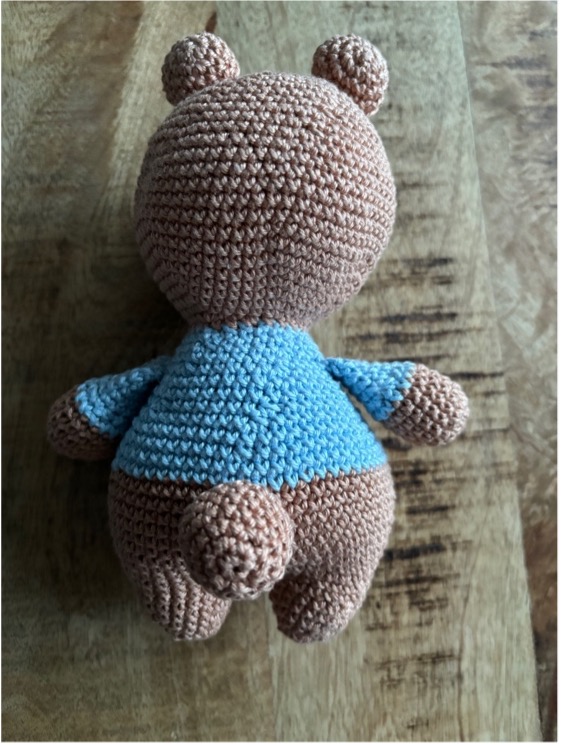
Tail (brown)
1. | 6 sc in mr | 6 |
2. | Inc in each sts | 12 |
3. | (1 sc, inc) x6 | 18 |
4-7 | Sc in all 18 sts | 18 |
8. | (1 sc, dec) x6 | 12 |
Stuff the tail slightly. Finish with a sl.st. and fasten off. Leave a long thread for attachment. Attach the tail on round 15-18 in the middle of the back.
Now you have created the entire bear. I hope the description was clear enough and the pattern is useful to you 😊. Have fun with the bear!
Love, Margo